Install door or window trim

Door and window trim covers the gap between the frame and the wall and provides an elegant finish. As the casing defines a perimeter and is a highly visible feature, it should blend with the architectural style of the room. Installing moulding is a simple project for all skill levels.

Before you start

This project explains how to install casing with 45° angles at the corners. Using rosettes or craftsman-style trim requires a simpler 90° cut.

Before you start, allow the mouldings to acclimatize for 24 to 48 hours in the room where they will be installed.

You can paint or stain your mouldings in advance. You'll simply need to touch them up a bit after, to cover the nail heads you've concealed with wood filler.

Use a good-quality finishing blade with a minimum of 40 teeth, though 80 teeth is preferable since the more teeth a blade has, the cleaner the cut.

Pre-drill your nail holes so the mouldings do not split. Use a drill bit of a smaller size than the nails.
1

Prepare the frame and adjust the cutting angles

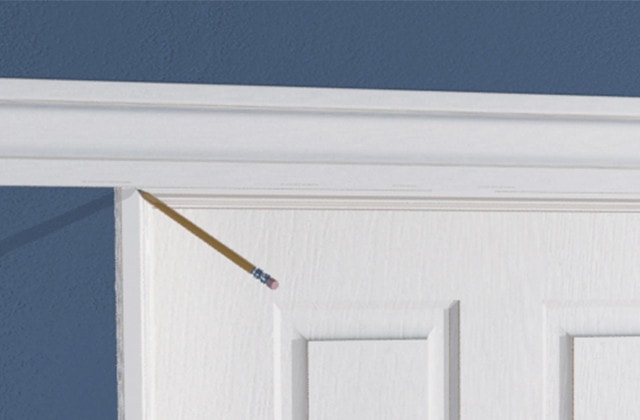
  • 1.1 - Mark a reveal line 3/16" from the edge of the jamb on which to align the moulding. This space will be visible, uncovered by the trim.
  • 1.2 - Draw this line on all sides of the frame.
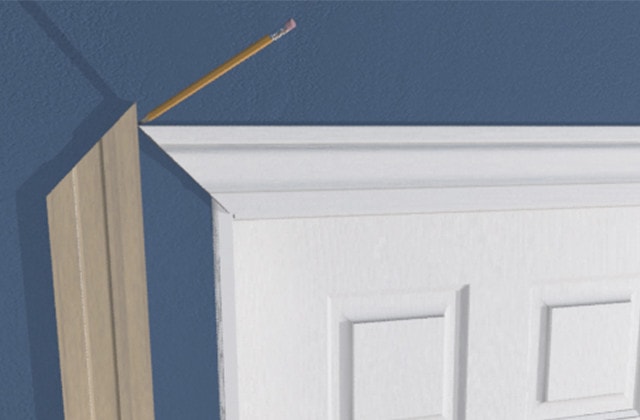
  • 1.3 - Check the mitre angles at the corners with two 12" test pieces cut at exactly 45°.
  • 1.4 - Hold the test pieces on the marks at the corner of the jamb to see exactly how your trim is going to fit. If you see a gap, adjust the mitre saw accordingly so that the pieces fit together perfectly, and cut both pieces at the new angle.
Moulding calculator
2

Install the head moulding

  • 2.1 - Place a piece of moulding along the top of the opening.
  • 2.2 - Draw the cutting line from where the marks on the frame jambs meet, indicating the cutting angles.
  • 2.3 - Lay the moulding flat on the mitre saw base.
  • 2.4 - Cut the 45° angles.
  • 2.5 - Using a level, position the moulding on the reveal line.
  • 2.6 - Tack the moulding to the jamb.
3

Install the moulding on the sides

  • 3.1 - Cut two lengths of moulding slightly longer than required.
  • 3.2 - Stand one length of moulding against the wall parallel with the door frame.
  • 3.3 - Stand one length of moulding against the wall parallel with the door frame.
  • 3.4 - Lay the moulding flat on the mitre saw base and cut the moulding at a 45° angle.
  • 3.5 - Using a level, place the moulding on the jamb and adjust the length or the angle if necessary.
  • 3.6 - Repeat with the second length of moulding on the other side.
  • 3.7 - Once the angles are properly adjusted, apply wood glue to the surface and nail the moulding together near the angle.
  • 3.8 - Drill small holes in the moulding at 12" to 16" intervals, then tack the moulding to the jamb with 1" finishing nails and to the wall with 2" nails.
  • 3.9 - Fully drive in the nails on the head moulding.
  • 3.10 - Wipe off the excess glue.
Finish all the nailing
4

Drive the tacked nails into the mouldings

  • 4.1 - Carefully adjust the corners and pre-drill into the top of the head moulding 1" from the end.
  • 4.2 - Nail the corners with 1/2" finishing nails.
  • 4.3 - Finish all nailing on the trim.
  • 4.4 - Countersink the nails using a nail set.
5

Install window trim

  • 5.1 - Mark a reveal line on the perimeter of the window frame.
  • 5.2 - Start with the head moulding using the techniques outlined previously.
  • 5.3 - Measure and cut the side mouldings and adjust the angles of the upper corners.
  • 5.4 - Tack in the side mouldings.
  • 5.5 - Cut the angle of one end of the lower moulding and adjust.
  • 5.6 - Measure and cut the angle of the other end of the lower moulding.
  • 5.7 - Adjust all the corners until the fit is perfect.
  • 5.8 - Glue and nail in all the mouldings as previously indicated.

Related products