Share
Do it yourself

Garden Tool Storage

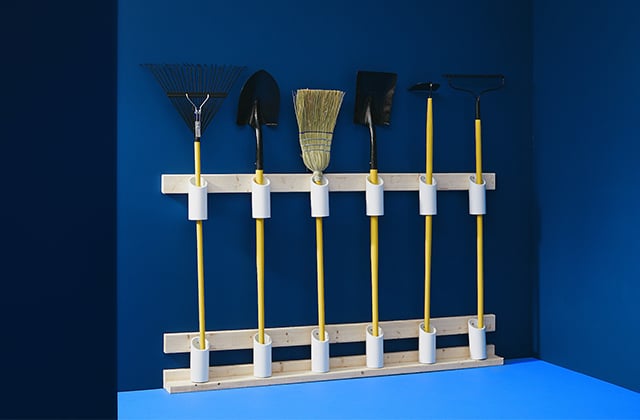
The secret to an efficient shed is organized storage. Simple and inexpensive, this wall storage can be built in less than an hour with little material. Nothing beats an organized shed to find what you need. See the plan for plank dimensions and the assembly instructions.

1

Prepare the wood

  • 1.1 - Measure and cut the 4 beams at 72".
  • 1.2 - Create the base by assembling 2 beams to form an «L» shape.
  • 1.3 - Place the «L» on the ground and secure it to the wall.
  • 1.4 - Measure 6" from the ground and secure a beam to the wall. Use a level if needed.
  • 1.5 - Measure 38" from the ground and secure a beam to the wall. Use a level if needed.

Pro Tip

To soften the beams, roughly sand each piece before installation.
You can paint, stain, or varnish the wood if desired.
2

Prepare the pipes

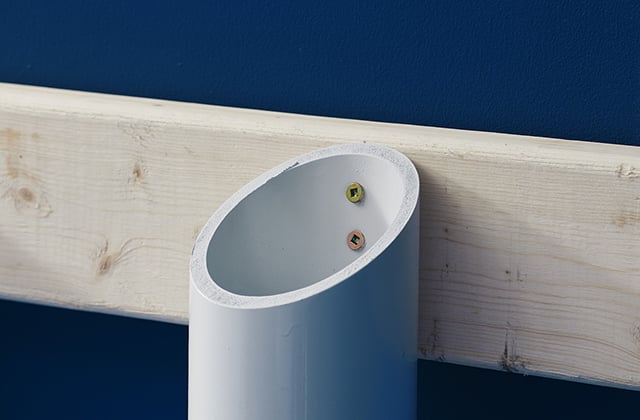
  • 2.1 - Cut the tip of a pipe at a 45° angle. Measure 6" from the top of the angle and cut the pipe at a straight angle.
  • 2.2 - Repeat step 2.1 12 times.
  • 2.3 - Using a drill, make 2 holes at the top each pipe’s angle.
  • 2.4 - Install the first piece at 6" from the edge of the beam. Calculate 12" between each pipe.
  • 2.5 - Secure 6 pieces into the beam at 6" from the ground, and the other 6 into the beam at 38" from the ground.
3

Organize the garden tools

  • 3.1 - Place the garden tools into the storage system.

Suggested products