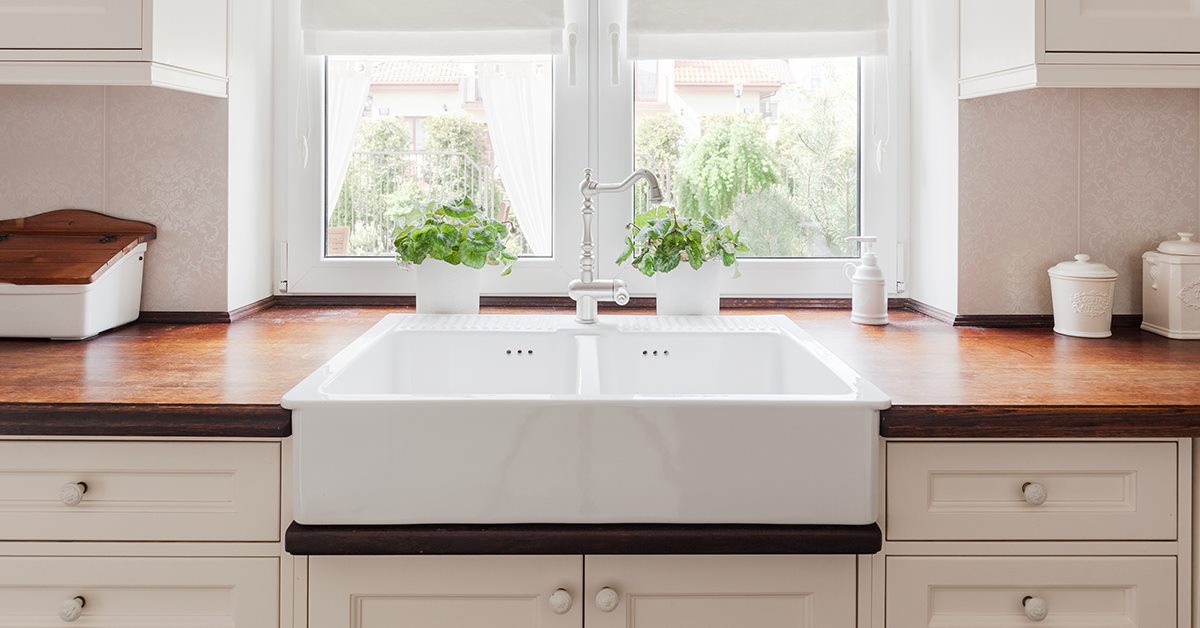
Install an undermount sink

Undermount sinks are as practical as they are sophisticated. With the edge of the sink below the countertop, cleanups are a breeze!

Installation is a little more complicated than for a standard drop-in sink, since an under-the-counter sink rests on a structure that properly installed, is strong enough to support the weight of the sink filled with water.

Follow these steps and the manufacturer's instructions carefully. If you have any doubt or concerns, do not hesitate to call in a professional.

Before you begin

Undermount sinks are not recommended for wood, laminate or ceramic-tile countertops.

Always refer to the installation guide supplied by the manufacturer.

This project explains how to install an undermount sink using clips and glue-on bases.

Other methods include:

  • Rail system
  • Mounting brackets
  • Wood support frame
  • Plywood (½") under the counter

Although a wood support frame is an option for all sinks, it is required for heavy non-rectangular sinks and granite sinks.

Ensure that the frame and fasteners can support 300 lbs (136 kg). It’s not only the weight of the sink itself you have to consider, but the weight of the sink filled with water, the waste disposer and dishes.

First and foremost: Ask a professional to cut the openings in the countertop.

Pre-existing plumbing under the sink is assumed, and that the sink will be installed BEFORE the countertop is secured to the base cabinets.   

Wear safety glasses and protective gloves when working under the counter.

Don’t forget: turn off the water supply!

1

Cut out the openings

Leave it to the pros!

This step is not outlined because it requires specialized tools and pinpoint accuracy. Use the template provided with the sink and call on a professional to cut the openings in the countertop for both the sink and faucet.

You’ll need to specify which “reveal” style you want.

A particular reveal refers to how much of the sink edge is visible looking down into the sink. The three choices are:

Positive reveal: Part of the sink rim is exposed (1⁄8" or 3 mm).

Zero reveal: Edges of the countertop are flush with the sink walls.

Negative reveal: Countertop extends past sink walls (1⁄8" or 3 mm).

2

Mark the location of the sink

  • 2.1 - Turn the counter over onto a flat, level surface with the underside facing upward.
  • 2.2 - Mark the front and back.
  • 2.3 - Sand the underside of the counter around the edge so that the adhesive will bond well.
  • 2.4 - Clean with denatured alcohol and leave to dry.
  • 2.5 - Set the sink over the cut-out, with the hole for the faucet at the back.
  • 2.6 - Align and center for the desired reveal.
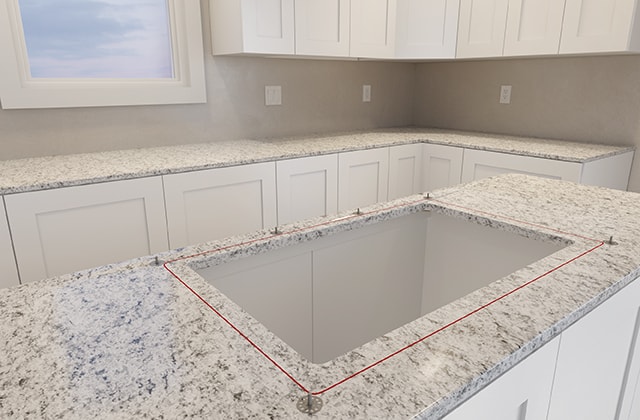
  • 2.7 - Trace around the rim.
  • 2.8 - Set aside the sink.
3

Install the mounting clips

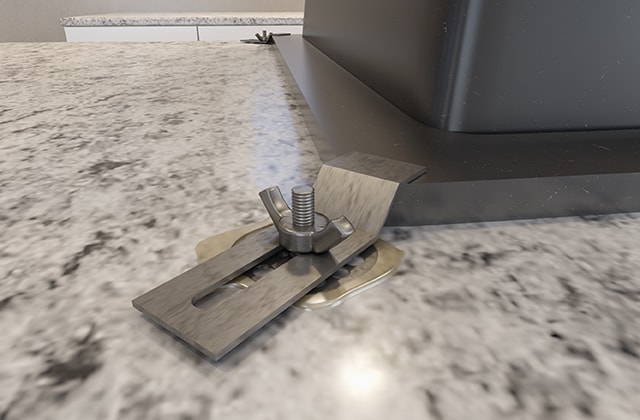
  • 3.1 - Disassemble the sink-mounting clips: nut, sink clip and base
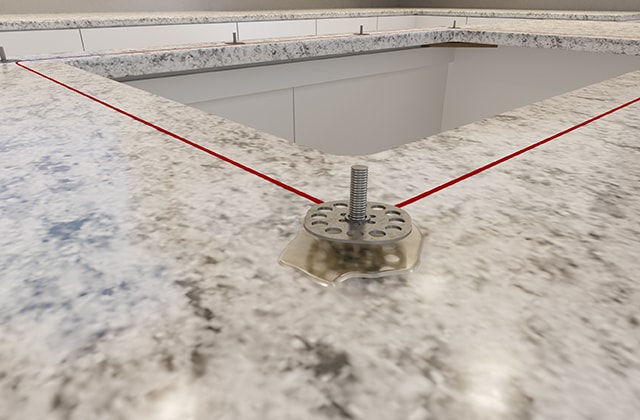
  • 3.2 - Lay out the positions of the mounting clips just outside the line you drew, ¼" from the edge of the sink. Provide 2 clips per side, spaced 10" apart.
  • 3.3 - Use denatured alcohol to clean each location.
  • 3.4 - Mix the 2-part epoxy in equal parts.
  • 3.5 - Apply a generous layer of epoxy to the base of one clip.
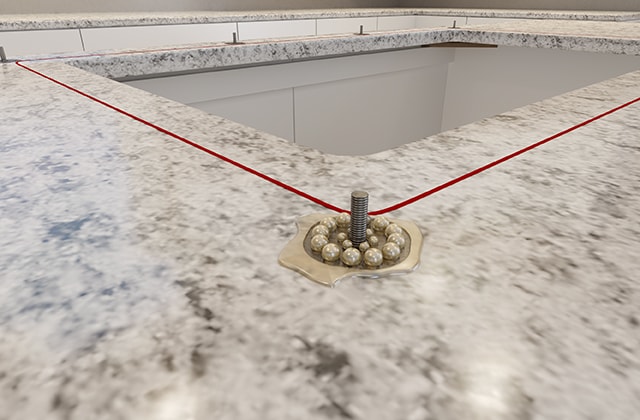
  • 3.6 - Press the base on the counter ensuring the epoxy completely fills the holes.
  • 3.7 - Repeat for all clips. Efficiency is key, because epoxy dries quickly.
  • 3.8 - Wait 20 minutes until the epoxy glue hardens.
4

Install the strainer in the sink bowl

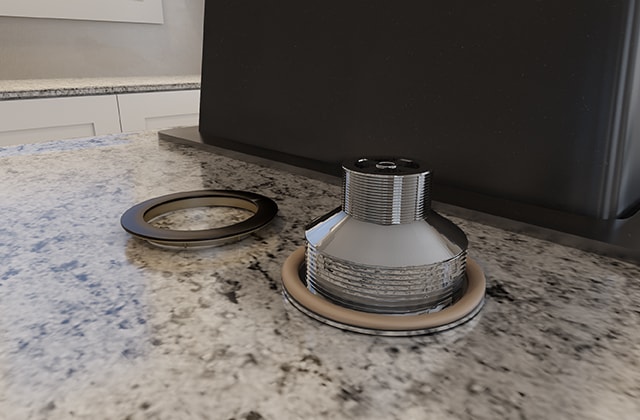
  • 4.1 - Apply a layer of plumber’s putty (or silicone sealant) around the drain hole.
  • 4.2 - Set the strainer in the hole and press down.
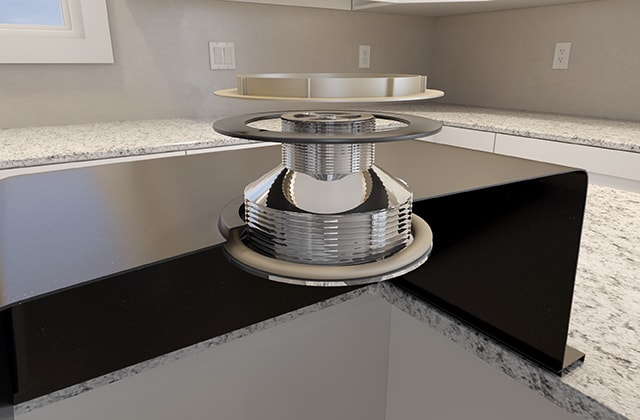
  • 4.3 - Under the sink, install a rubber gasket over the neck of the strainer.
  • 4.4 - Insert and hand screw the lock nut. Tighten a half turn using a pipe wrench.
  • 4.5 - Wipe away the excess putty.
  • 4.6 - Repeat these steps for the other bowl (if installing a double sink). If plans include a waste disposer, install the mounting ring.

Pro Tip

Working access will be improved if you install the faucet prior to securing the counter to the cabinets.
5

Secure the sink to the counter

  • 5.1 - Use alcohol to clean the edge of the counter with denatured alcohol.
  • 5.2 - Apply a 1/8" bead of silicone sealant to the opening, inside the line.
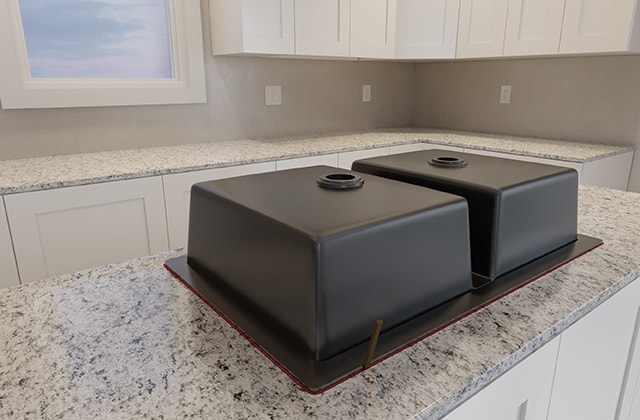
  • 5.3 - Turn over the sink and place it on the opening according to the outline.
  • 5.4 - Take a look at the other side to verify that the edge is even. Adjust if necessary.
  • 5.5 - Insert the clips in the base screws so that they rest on the edge of the sink.
  • 5.6 - Screw in the nuts alternating between sides to maintain the sink’s balance.
  • 5.7 - Hand-screw firmly to avoid pressure on the counter.
  • 5.8 - Clean off silicone residue on the edge of the sink.
  • 5.9 - Apply some silicone to the nuts.
  • 5.10 - Wait an hour before turning the counter over and placing it on the cabinets.
  • 5.11 - Wait 24 hours before using the sink.

Suggested products