How-to install a closet sliding door on a track

Ever practical, space-saving sliding doors are the ideal way to delineate areas of the home. Made with wood panels or fitted with mirrors, they are perfect for concealing closet clutter. Whether the sliding mechanism is at the top, on the bottom, or both, the installation process is simple and straightforward, and within easy reach of novices and seasoned amateurs alike. Follow the guide!

Choosing a sliding door

Sliding mechanism

The sliding mechanism for this type of door operates on tracks. Tracks are installed on the top of the door frame or on the bottom, on the floor. Doors may require two tracks.
Top track:
  • Durable and aesthetic
  • Supports both lightweight and heavier doors
  • No track on the bottom
Bottom track:
  • Easy to install
  • Ceiling guide to direct panels, but the weight of the door rests on the floor track
  • Ideal for lightweight doors
Top and bottom tracks:
  • Perfect for heavy door panels
  • Are also used for room partition doors

Track positioning

The position of the track is a matter of personal preference. It can be installed so that the door panels are flush with the wall or positioned in the centre of the frame.

Door with fascia mouldings covering the top track: the track should be aligned with the front of the opening.

Door with a bottom track: the floor track should be a minimum of 1" inside the opening.

Opening and number of doors:

Standard widths are 48", 60" and 72", whereas standard heights vary between 80" and 81½". Certain manufacturers also provide assemblies with doors 36" to 192" wide and up to 96" high. Depending on the width, door panels number between 2 and 6.

Panels may open in a single direction, to either the left or the right, or in both directions.
1

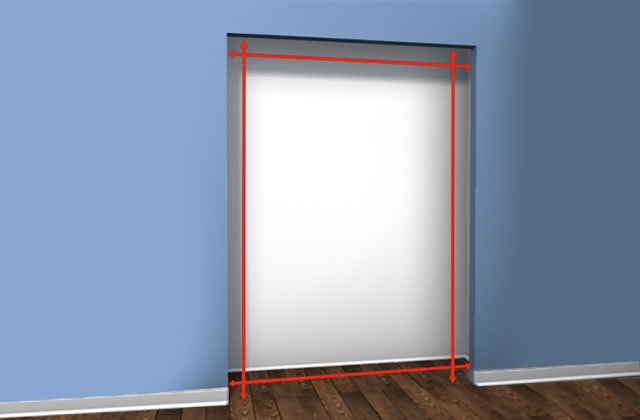
Measure the opening

  • 1.1 - Measure the finished, inside opening.
  • 1.2 - Measure and note the width at two locations, on the top and bottom of the opening.
  • 1.3 - Measure and note the distance between the floor and the frame at two locations, on the left side and on the right side.
  • 1.4 - Measure and note the thickness of the frame at two locations.
  • 1.5 - Use the smaller of each pair of measurements to guide your choice of door model.
  • 1.6 - Base your choice of door on the results of your measurements.
2

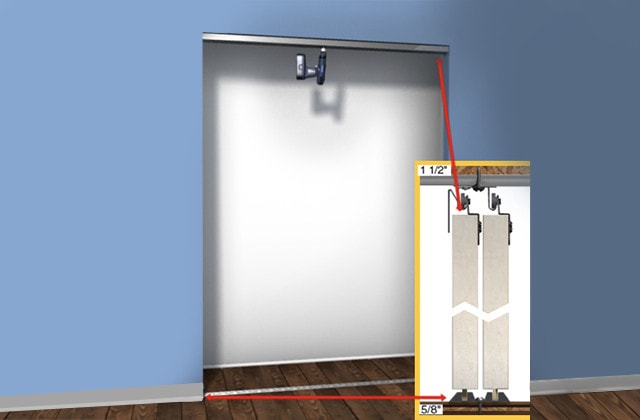
Mark the position and secure the tracks

  • 2.1 - Use a tape measure to measure and mark the position of the top track on the right and left sides of the opening. Measure from the front of the opening so that the door panels will appear perfectly equidistant when viewed from the exterior.
  • 2.2 - If necessary, use a hacksaw to cut the guide rails according to the measurements obtained earlier. Insert wood shims near the cuts to keep the track square and straight. Place the top track in the top of the opening, aligned with the marks. Hold it in place with small nails or clamps.
  • 2.3 - Screw through the pre-drilled holes with 1½" screws, usually included with the doors. Pre-drill the wall and use pins if your doors are very heavy.
  • If the system includes a track on the floor:
  • 2.4 - Use a plumb line to indicate the location of the bottom track. Put the line on the front face of the top track.
  • 2.5 - Read the manufacturer's instructions carefully to check by how much the bottom track should be recessed in relation to the top track, and mark the location.
  • 2.6 - Temporarily position the track on the floor where marked.
  • 2.7 - Install a door panel and check that it is plumb.
  • 2.8 - Adjust the floor track accordingly.
  • 2.9 - Screw the track securely to the floor.
3

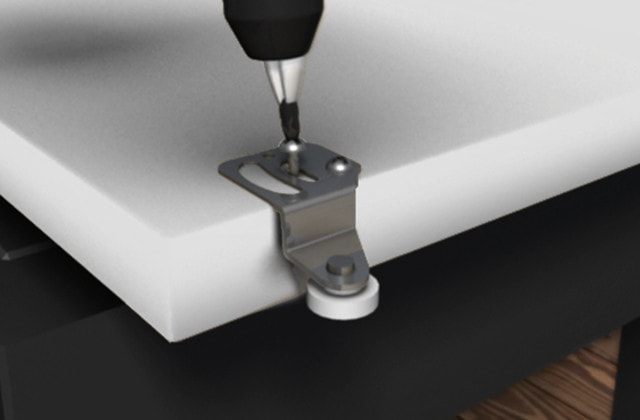
Install the roller brackets

For the majority of sliding door assemblies, the roller brackets are pre-installed. Mark the location for the brackets according to the manufacturer's instructions. As a general rule, the brackets will be positioned on top on either side of the door, approximately 2½" from each end.
  • 3.1 - Pre-drill the door panel if this has not already been done.
  • 3.2 - Using the hardware provided, screw the roller brackets onto the top of the door, making sure that the rollers are able to move freely.
4

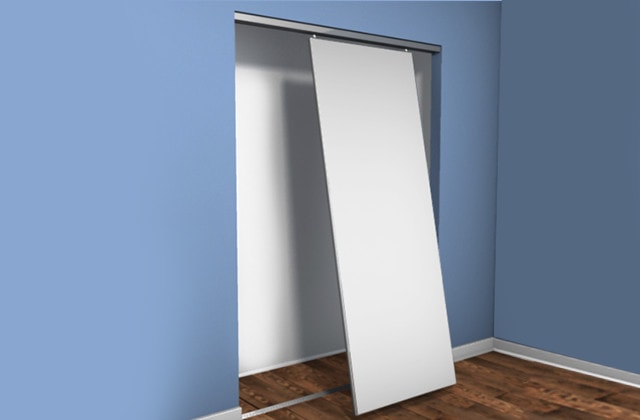
Hang the doors

  • 4.1 - Start with the “back” door, towards the inside of the closet.
  • 4.2 - Angle the lower part of the door out of the closet.
  • 4.3 - Set the door rollers inside the top track.
  • 4.4 - Insert the bottom rollers into the grooves. (If the door model includes a bottom track)
  • 4.5 - Slide the door back and forth to ensure it is working properly.
  • 4.6 - Repeat these steps for the “front” door.
5

Adjust the doors

  • 5.1 - Use a screwdriver to adjust the roller brackets, either at the top or on the bottom of the door depending on the model selected.
  • Sliding system with floor track:
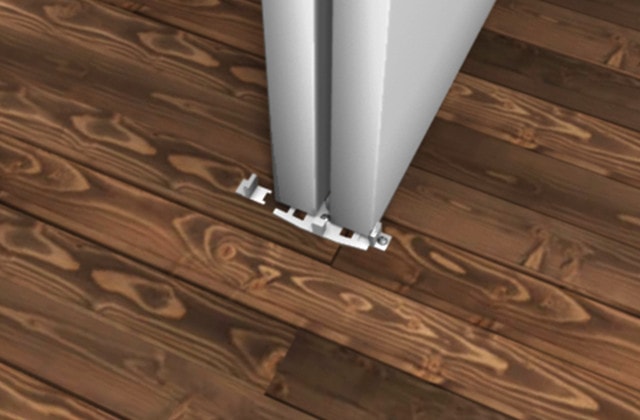
  • 5.2 - Put pressure on the track stabilizers until they are properly inserted into the track.
  • System without a floor track: install the floor guide
  • 5.3 - Measure and mark the centre of the closet opening.
  • 5.4 - Position the centre of the floor guide to be aligned with the mark you made in the previous step, equidistant between the two door panels.
  • 5.5 - Screw into the floor surface.
  • 5.6 - Place the exterior sections of the floor guide on either side of the doors. Maintain 1/8" clearance so doors will slide easily.
  • 5.7 - Screw into the floor surface.
  • 5.8 - Ensure that doors slide open and shut without interference.
6

Install the handles

  • Recessed or screwed-in handles:
  • 6.1 - Secure the handle in the opening pre-cut by the manufacturer.
  • Self-adhesive handles:
  • 6.2 - Mark the location of the handles approximately 36" from the floor and equidistant from the edge of the door.
  • 6.3 - Attach the self-adhesive handles.
  • Screwed-in handles:
  • 6.4 - Mark the location of the handles approximately 36" from the floor and equidistant from the edge of the door.
  • 6.5 - Pre-drill holes according to the model chosen.
  • 6.6 - Screw in the handles.

Suggested products